Introduction:
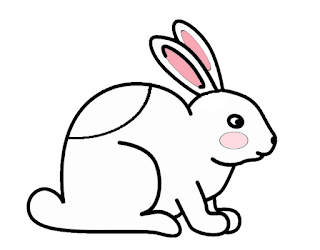
Drawing is a wonderful form of expression that allows individuals to bring their imagination to life on paper. If you're a fan of furry creatures and want to try your hand at capturing the charm of rabbits on canvas, this step-by-step guide is tailored just for you. Follow these simple instructions, and soon you'll be creating adorable rabbit drawings that are sure to captivate any audience.
Step 1: Gather Your Materials
Before you embark on your rabbit drawing journey, ensure you have all the necessary materials. You'll need:
Drawing paper or sketchbook
Pencils (preferably HB or 2B for initial sketching)
Eraser
Fine-tipped pens or markers
Colored pencils or markers (optional)
Step 2: Reference Image
Find a clear reference image of a rabbit that inspires you. This will serve as your guide throughout the drawing process. Pay attention to details like fur texture, facial expressions, and body posture.
Step 3: Basic Shapes for Framework
Start your rabbit drawing by sketching basic shapes to establish the framework. Use simple circles and ovals for the head and body. Add lines to indicate the placement of ears and limbs. This initial sketch will serve as your guide for refining the details.
Step 4: Refine the Outline
With the basic framework in place, begin refining the outline of your rabbit. Pay close attention to the contours of the body, ears, and facial features. Adjust the proportions as needed to ensure a balanced and realistic representation.
Step 5: Add Facial Features
Focus on the rabbit's face, adding details like eyes, nose, and mouth. Capture the characteristic expressions that make rabbits so endearing. Use light strokes at this stage, allowing you to make adjustments easily.
Step 6: Fur Details
Rabbits are known for their soft, fluffy fur. Use short, gentle strokes to simulate the texture of fur. Pay attention to the direction in which the fur grows, creating a sense of realism. Vary your pencil pressure to add depth and dimension to the fur.
Step 7: Finalize the Details
Once you're satisfied with the overall structure and fur texture, finalize the details. Add small features like whiskers, paw pads, and any distinct markings on the rabbit. Take your time and enjoy the process of bringing your drawing to life.
Note: Learn More about Importance of "Early Childhood Education"
Step 8: Ink or Color (Optional)
If you wish to enhance your rabbit drawing further, consider using fine-tipped pens or markers to outline the final drawing. You can also add color using colored pencils or markers to make your rabbit truly pop.
Conclusion:
Drawing a rabbit can be a delightful and rewarding experience. Whether you're a beginner or an experienced artist, following these step-by-step instructions will help you create charming rabbit drawings that showcase your creativity and attention to detail. Remember, practice makes perfect, so don't be afraid to experiment with different styles and techniques to develop your unique rabbit-drawing skills.


