Introduction:
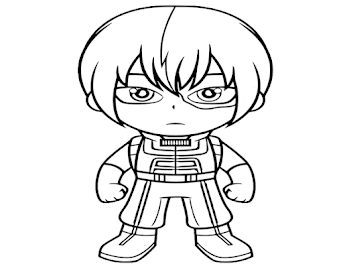
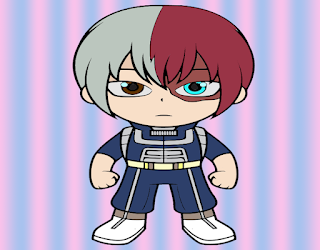
Todoroki Shoto, the enigmatic hero from the popular manga and anime series "My Hero Academia," has captured the hearts of fans worldwide with his powerful Quirk and complex character. If you're a fan of Todoroki and want to bring this iconic character to life on paper, you're in the right place. In this step-by-step guide, we'll walk you through the process of drawing Todoroki, capturing both his fire and ice elements.
Materials:
Before we begin, make sure you have the necessary materials:
Drawing paper or sketchbook
Pencils (HB for sketching, 2B for darker lines)
Eraser
Fine-tip black pen or ink pen
Colored pencils or markers (optional)
Step 1: Reference Gathering
Start by collecting reference images of Todoroki from various angles. Pay attention to his distinctive features, hairstyle, costume details, and the way his fire and ice Quirks manifest. Familiarizing yourself with these elements will help you create a more accurate and dynamic drawing.
Step 2: Basic Sketch
Using an HB pencil, lightly sketch the basic shapes that make up Todoroki's head, body, and costume. Pay attention to proportions and try to capture his pose accurately. Don't worry about details at this stage; focus on getting the overall structure right.
Step 3: Facial Features
Refine the facial features, paying close attention to Todoroki's eyes, nose, and mouth. Capture the determined expression that defines his character. Once you're satisfied with the face, add his signature scar over his left eye. Remember to keep your lines light and adjust as needed.
Step 4: Hair and Costume
Todoroki's distinctive hairstyle is a crucial part of his character design. Use bolder lines to define the strands of hair, ensuring they fall naturally around his face. Move on to sketching his hero costume, emphasizing the details such as the asymmetrical design and the belt with the 'X' buckle.
Visit the Easy Drawing For kids tutorials on the soft roots website.
Step 5: Ice Quirk
Begin adding the ice element to your drawing. Sketch the ice formations on Todoroki's left side, paying attention to the intricate patterns and shapes. Use reference images to guide the placement of the ice, creating a dynamic and visually interesting effect.
Step 6: Fire Quirk
Switch to the right side of Todoroki's body to incorporate the fire element. Sketch flames with a flowing, dynamic motion. Take your time to add details like the intensity of the flames and the way they interact with his costume. This step is crucial in conveying Todoroki's dual-nature Quirk.
Step 7: Inking
Once you're satisfied with your pencil sketch, go over the lines with a fine-tip black pen or ink pen. Be confident in your strokes, and use varied line weights to add depth and definition. Erase any remaining pencil lines after inking.
Step 8: Optional Coloring
If you want to add color to your Todoroki drawing, use colored pencils or markers to bring the fire and ice elements to life. Pay attention to the color palette of the character, using shades of blue for the ice and warm tones for the fire.
Conclusion:
Congratulations! You've successfully brought Todoroki Shoto to life on paper, capturing the essence of his fire and ice Quirks. Drawing this iconic character is not only a fun artistic challenge but also a great way to showcase your love for "My Hero Academia." Keep practicing and experimenting with different poses and expressions to further hone your drawing skills. Enjoy the process, and let your creativity flow like Todoroki's elemental powers!


