Introduction:
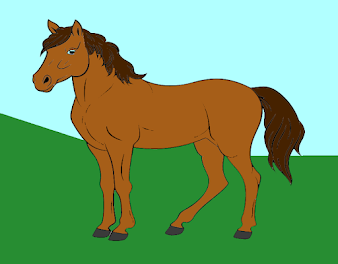
Horse drawing can be a rewarding and captivating artistic endeavor. Whether you're a seasoned artist or a beginner, capturing the grace and power of these magnificent creatures on paper is an exciting challenge. In this step-by-step guide, we'll walk you through the process of creating a stunning horse drawing, from the initial sketch to the final details.
Step 1: Gather Your Materials
Before you start drawing, make sure you have all the necessary materials. You'll need a sketchbook or drawing paper, pencils of varying hardness (2H to 6B), an eraser, and a blending tool. Having a good set of reference images or even observing horses in person can provide valuable insights into their anatomy and movement.
Step 2: Start with Basic Shapes
Begin your horse drawing by sketching basic shapes to establish the overall structure. Use light lines to draw the head, body, and legs. Pay attention to proportions and angles. The head can be represented as an oval, and the body as a larger oval or rectangle. This initial sketch will serve as the foundation for your drawing.
Step 3: Define the Anatomy
Once you're satisfied with the basic shapes, start adding more details to define the horse's anatomy. Pay close attention to the placement of features such as the eyes, ears, and nostrils. Study the muscles and contours of the horse's body, emphasizing the curves and lines that convey its strength and grace.
Step 4: Refine the Outline
Gradually refine the outline of your horse drawing. Use darker lines to emphasize the contours and add more definition to the various body parts. Pay attention to the legs, ensuring they are properly proportioned and positioned. Take your time to capture the unique characteristics of the breed you are drawing.
Visit the Easy Drawing For kids tutorials on the soft roots website.
Step 5: Add Shading and Texture
Shading is crucial for bringing your horse drawing to life. Consider the direction of light and add shadows accordingly. Use a range of pencils to create different tones, from light highlights to dark shadows. Pay attention to the horse's coat texture, incorporating short strokes for a sleek coat or longer strokes for a more mane-like effect.
Step 6: Focus on the Eyes
The eyes are often considered the windows to the soul, and this holds true for horse drawings as well. Spend time detailing the eyes, capturing their expression and depth. The placement and size of the eyes can greatly influence the overall appearance of your drawing.
Step 7: Fine-Tune Details
As you approach the final stages of your horse drawing, take a moment to fine-tune the details. Refine any areas that need adjustment and add subtle touches to enhance the overall realism. Pay attention to small details such as hooves, facial features, and tail.
Step 8: Sign and Appreciate Your Work
Once you are satisfied with your horse drawing, sign your artwork and take a moment to appreciate the effort you've put into creating a beautiful representation of these majestic creatures. Don't be afraid to experiment with different styles and techniques to develop your own unique approach to horse drawing.
Conclusion:
Drawing a horse can be a fulfilling and enjoyable artistic journey. By following these step-by-step guidelines, you can create a stunning horse drawing that captures the essence of these remarkable animals. Remember to practice regularly and embrace the process of continuous improvement in your artistic skills. Happy drawing!


