Introduction:
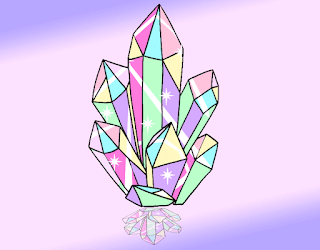
Crystals have captivated the human imagination for centuries, symbolizing beauty, mystique, and healing energy. Drawing crystals can be a rewarding and meditative experience, allowing you to express your creativity while exploring the intricate facets of these mesmerizing formations. In this step-by-step guide, we will take you through the process of drawing crystals, unlocking the secrets to capturing their ethereal allure on paper.
Materials Needed:
Drawing Paper: Select a high-quality drawing paper to provide a smooth surface for your artwork.
Pencils: Use a range of pencils, from 2H for light sketches to 6B for darker lines and shading.
Eraser: A soft eraser is essential for refining details and cleaning up your drawing.
Ruler: A ruler helps create straight lines and precise angles.
Reference Images: Collect images of crystals to inspire and guide your drawing. Observe the various shapes, sizes, and arrangements.
Step 1: Sketch the Basic Shape
Begin by lightly sketching the basic shape of your crystal. Crystals come in diverse forms such as hexagonal prisms, cubes, and clusters. Choose a shape that resonates with your artistic vision. Use simple geometric shapes as a foundation for the crystal's structure.
Step 2: Define the Facets
Identify the facets or faces of your crystal. These are the flat surfaces that catch and reflect light. Crystals often have sharp, angular facets that contribute to their unique appearance. Draw these facets using straight lines and gentle curves, paying attention to their arrangement and size.
Step 3: Add Details
Enhance your crystal by adding details such as cracks, inclusions, or irregularities. These imperfections contribute to the authenticity of your drawing. Experiment with different line weights to emphasize certain features, creating depth and texture.
Step 4: Shade and Shadow
Consider the direction of light in your drawing and add shading accordingly. Darken areas that are away from the light source, and leave lighter areas where the light hits the crystal. This step adds dimension to your drawing, making the crystal appear three-dimensional.
Step 5: Refine and Clean Up
Review your drawing and refine any details that may need adjustment. Use your eraser to clean up lines and smudges, ensuring a polished final result. Take your time to make subtle adjustments, paying attention to symmetry and balance.
Step 6: Experiment with Color
While many artists choose to draw crystals in grayscale, you can experiment with adding color to your artwork. Consider using colored pencils or watercolors to bring vibrancy to your crystals. Research various crystal types to accurately depict their coloration.
Note: Learn More about Importance of "Early Childhood Education"
Step 7: Background and Composition
Consider the composition of your drawing and decide whether to add a background. A simple background can enhance the overall presentation of your crystal drawing. Experiment with different compositions to find the one that best showcases your artwork.
Conclusion:
Drawing crystals is a journey into the fascinating world of geometric shapes, light play, and intricate details. Whether you're a beginner or an experienced artist, this step-by-step guide provides a foundation for creating stunning crystal drawings. Let your creativity flow as you unlock the magic within each facet, bringing these enchanting formations to life on paper.


